HomeAbout MeClassesOn-line ClassesPressRosa & JosieContact

Showing posts with label tutorial. Show all posts

Wednesday, March 21, 2012

two winners & on a wing & a prayer

A quick peek at a new piece...
metal, wire, faceted aquamarine nuggets, oxidized crystal rondells, recycled sari silk,
and a vintage rhinestone earring connector...
speaks to me of Spring~new beginnings~hope. 
Many things in the works here at Studio Diane.
I have visions of Antique week running though my head, 
as it begins a week from this Friday.
Many of the fields are beginning to buzz with movement.  Some will be open before then.
I can hardly keep my feet still, thinking about it!
But, here I must stay for a few more days, 
in Studio Diane
working, dreaming, praying.
Yesterday was the first day of Spring,
and my husband drew two names out of the hat 
for the tutorial I mentioned way back here and here.
The winners are:
D Fritz
and 
maryharding
Please contact me ladies =)

Monday, March 05, 2012

a new listing...

"flower dreams"
If you just can' wait, my newest Etsy listing for
Transforming Vintage Jewelry into a Connector
is now here 
in my Etsy shop =)
Or,
as shared here and here,
2 people can win this tutorial.
The drawing will be on the first day of Spring,
March 20, 2012!
Leave a comment on either of the two posts mentioned above
for your chance to learn how to make your very own vintage jewelry connector...
"flower power"
 p.s. you'll see a little snip-it of my video at the bottom 
of my previous post here.

Saturday, March 03, 2012

Bead Soup Blog Hop

"Blue Laurel"
This is my third time to participate in the Bead Soup Blog Party,
the brainstorm of an idea by my friend,
Lori Anderson.
Each time seems to get better than the last, so here we go...
When I opened up the package from my partner,
that held this vintage sterling silver book marker,
I knew I had to use it. But, how?
I didn't exactly know, but it was here that I started.
I began by layering "Laurel" with a wonderful vintage brooch. 
I wish I could remember where this one came from, but alas I don't.
  I just know I liked it because of its shape, dainty rhinestone dangles, and great old rhinestones set in vintage pot metal.
When I pulled it out of my stash, 
it just looked like it belonged on top of the book marker, 
as it matched its shape so perfectly.
I tried it in all different directions, before deciding to slide it down just a bit to expose the wonderful curves at the very top of the marker.
 Next, I started traveling down to the lower part,
wrapping it with some of these tiny beauties from Lyn.
 I chose the peacock seed pearls to work with,
even though I tried desperately to squeeze in those beautiful creamy white ones.
I added a faceted crystal quartz dangle,
using a cool new bead cap I bought after one of my students, 
Michele, showed me some she had brought to class.
I pulled the pieces together by stringing a simple choker using the same peacock seed pearls and the gorgeous sterling silver clasp given to me by Lyn, 
then made some of my favorite rondell bead connectors.
 Lyn sent these clear, blue lined glass ones in my package.
I often use this style, sandwiching tube beads (sometimes long, sometimes short) in between two oxidized crystal rhinestone rondells.  
I sprinkled in some wire wrapped oxidized crystal rhinestone ball beads, vintage rhinestone buttons, some great chain, and all of the Indian silver beads sent to me by Lyn.
Now I have a great 4-piece set.
 Each piece can be worn individually or separate on their own.
 ~Next~
I had to use some of Lyn's gorgeous lampwork beads.
She's a master of color and style.
She sent a good stash of her wonderful ruffles of glass, 
in colors I adore.
I began by laying three of my favorites down on the table.
I tend to use things left lying on my work bench, and magically it always works out.
Once again it did, as I spotted one of my etched hearts sitting just to the right of my  beading pad, just waiting to be used.
I strung the ruffled beads onto three pieces of sterling silver wire,
using more of the rhinestone buttons, now as centers to the beads;
twisted more wire around the base to hold the trio together,
 then pulled the wire thru a piece of brass filigree, sort of arrow style...
punching and lacing this little sandwich onto the etched heart. 
I don't wear pins, so I knew this had to become a necklace.
I was stumped and had to sleep on it, which works for me. 

The next day I looked through my jewelry trays and found a necklace I had bought on Etsy,
one that had beautiful rhinestones that just seem to match 
the rhinestone button centers of my heart pendant so perfectly. 
First I had to set two eyelets, one in the heart, one in the filigree.
Then I used a technique I enjoy and incorporate into my designs often.  
I re-purposed a vintage Eisenberg ear bob into a connector.  
That's it just to the left of my heart.
 I did use one of the two vintage faceted earring drops Lyn sent, 
as the dangle beneath the heart.  It matched the ruffles perfectly.
~Next~ 
I wanted to use the last three of of Lyn's glass ruffles,
 so I made a fun cascade necklace, using them 
along with several brass crucifixes,
and the acid green freshwater pearls she also sent in my soup.
 If you have stuck thru with me all the way to this point
you get to see all of my soup pieces together.
 
 So now you also can watch a sneak peak 
of my new online tutorial which I talked about 
here.
Leave a comment (along with an email address if it's not connected to your name), 
and you too will be entered in the drawing, 
as two people will win one of my tutorials called,
Transforming Vintage Jewelry into a Connector,
which is exactly what I did when I re-purposed the Eisenberg ear bob talked about earlier.
You can see it again, just below in the necklace I call
"Flower Power"
Thanks for sticking all the way to the end.
Don't forget the drawing to win this tutorial,
(that will be is in my Etsy Shop on Monday, March 5th now)
will be on the first day of Spring,
March 20th, 2012!
Here's a snip-it.  Enjoy!

Tuesday, February 28, 2012

bead soup and a drawing

I don't think I've had the opportunity to share the big news about my east coast friend 
Lori Anderson's
Bead Soup book coming out this fall.
Not only that, I am honored to be a part of it.
Lori is the brainstorm queen behind the semi-annual
Bead Soup Blog Hop...
which resulted in the Bead Soup book!
This Saturday, March 3rd, you will be able to see the creations made by
200 participants.
This is my third participation, and I must say,
it really is one of the highlights of my year.
It stretches me and gives me a refreshing prompt.  If you are a new jewelry designer, 
or an ole' seasoned metalsmither, you will like it.  I promise.
Taking what you receive from your swap partner and putting your stamp on it,
is what it's all about.
I like to think of what Forest Gump's mama said,
Life is like a box of chocolates.  You just never know what you're gonna get. 
 The same goes for the Bead Soup Blog Hop.
Take what you get and make it work.  Make it yours.
You have no idea where it can take you, and where you can go from there.
In celebration and preparation for this fun event,
I am having a itty bitty drawing.
I would love if you would leave a comment, talk about it on Facebook, tweet about,  or whatever.
And, if you decide to follow along with me on my blog, well that will be icing on the cake,
and another drop in the hat for you =)
So, now...what will you win?
Well, since using vintage rhinestone jewelry in my jewelry designs is one of my many passions, I have created a little video tutorial called
Transforming a Vintage Earring into a Connector
which is about to end up in my Etsy shop.
If you have ever wanted to know how to make a connector out of a vintage scatter pin, brooch, ear bob or screw back earring, this will show & tell you how.
It is one of the techniques I used in a piece of jewelry I'll be revealing for the hop on Saturday! 
I will be giving away two of these tutorials
on the first day of Spring, which is
March 20th!
 Here's a sneak pic.
 So please stop by on Saturday to see my blog hop jewelry.
I've made several pieces with the stash of goodies sent by my bead soup partner, 
And, don't forget to leave your comment here and there~BOTH DAYS~if you like.
All names on these two days will go into the hat for the drawing.
I will also have a snippet clip of the video on Saturday!
BTW...here was my post from the last Bead Soup Blog Hop, 
when I was paired up with the ever talented,  
And, the one before that,
when I was swap buddies with a wonderful lampwork bead artist named,
P.S. Don't forget to let me know how to get in touch with you, if your email address isn't attached to your name via your comment!

Friday, March 19, 2010

Ever felt like the tin man?

I have been known to wear myself out! Bet you know what I mean.
Adorn Me! took a lot of time and preparation, and I enjoyed EVERY last minute of it.
I am one to not sit still, and I think you know that by now, if you have kept up with me for any length of time.

I have been working the last couple of days getting ready to list the Crystal Princess Drop tutorial in my Etsy shop. It is now there.
I am also in the process of stocking my Etsy shop with vintage bits and more to cover this project.
If you decide to buy the tutorial, and are in need of some vintage supplies right now, please contact me & I will eagerly show you some of the vintage bits & more I have for sale, and then reserve list it in my shop just for you!
~~~~~~~~~~~~~~~
Don't forget about the drawing for the Crystal Princess Drop. Details are here.
I will choose a winner when I return from the Antique Festival, April 4th, 2010!
Crystal Princess Drop
~~~~~~~~~~
So, looks like Day Two of Adorn Me! (which I spent with my great friend, Riki Schumacher and Thomas Mann*wink*) will have to be posted another day....
You won't be disappointed, it was all GOOD.

Tuesday, December 23, 2008

my gift to you

While uploading some of my Christmas gift pictures, I thought I'd have a little picnik fun. I'd like to share it with you! Begin by uploading a picture. Hit the create tab, then click on effects, then scroll down to black & white. Once you click on the black & white tab (your entire picture wil turn black & white), another little window will pop up. You will see effect and original tabs in the box. Click on original, as this is the way you will bring the original color back into the picture, object or objects. You can change the brush size, if you have alot of painting to do. Or, keep it small if you have tiny areas you want to add the original color back onto. Setting the brush hardness also helps to spead up re-coloring large areas. Do not leave it on 0% or you won't be able to change a thing~
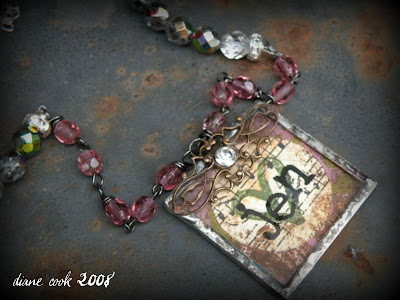
"jennifer's dance"
**********
Or, there is another way. Once you hit the black and white tab, check the reverse box. Then, click the original tab and you can take away the color, making whatever you paint black and white. It is fun, and can become quite addictive. This is what I did with Lisa' s charm below as an example~


I checked the reverse box, and painted part of the charm, one of the angel wings, and some of the background in the picture behind it, to make it black and white. I changed the size of the brush as I went~as to not go over the lines.

These charms, used to make necklaces, were made with alot of love. This is the reason I give. This is my "love filled" gift to you.

Merry Christmas!