HomeAbout MeClassesOn-line ClassesPressRosa & JosieContact

Showing posts with label etching. Show all posts

Sunday, April 01, 2012


Artful Gathering Event Registration is Open!


I am very happy to announce that this week I'm
the Spotlight Artist for The Artful Gathering Blog Hop!

Follow along with me for fun, creativity, and a chance to win a
$200.00 e-gift card from Jerry's Artarama!


I will be teaching two fabulous premiere video workshops at

The Artful Gathering Online Art Retreat 2012


Heart Strings


Session One
June 6 - July 17 


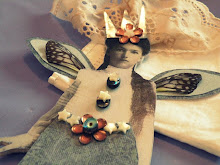
A vintage brass thimble is the beginning component, and my inspiration, for a necklace I call “Heart Strings”, which I first shared in the Spring 2011 issue of Belle Armoire Jewelry.

Made using layers of luscious strips of recycled sari silk, Dupoini silk, vintage lace and/or tulle, along with multiple lengths of various pieces and types of chain, you will enjoy exploring the possibilities of perhaps using baroque pearls, semi-precious beads, vintage bits and baubles, buttons and charms, or perhaps favorite pieces of brass filigree.

In this class I will guide you through your very own creative process, as you begin to creatively transform these tassels into beautiful works of art.
I will show you how to add various lengths of chain, bits from a gorgeous piece of  vintage rhinestone earring or bracelet, rosary chain; as well as how to wire wrap your beads, pearls and crystal rondells. Two more techniques that I will share in class, is how to design one of my "tiny etched books", and the other will be my  wire nests I call “nesties”. There are actually endless uses for these two pieces way beyond the Heart Strings class.

If that isn’t enough, you will have the option to adorn your thimble and tiny book with vintage text. I will show you how! And, if you choose to add one of my favorite brass lockets, I will show you how to use mica to cover your image or special words that will be tucked inside.

Finally, I will show you how to create a simple necklace, using a combination of either recycled sari silk or vintage lace and chain. You may want to add a sprinkle of wire wrapped beads, pearls or crystals…finishing with a choice of simple hook closures.

This is a class full of techniques, and GREAT fun!


Etched and Layered Cuffs


Session Two
July 15 - August 25


Etched and Layered Cuffs made their debut in the Summer of 2010, when they were published in Stampington and Company’s, Belle Armoire Jewelry Magazine. Since then I have designed more than I can count. I have taught a total of seven classes at national retreats, as well as locally, and continue to have requests for more!

In this class, I will share my experience and special tips and tricks for preparing and stamping several styles and sizes of pre-made brass metal cuffs. I will walk you through the steps for successful etching, which will include important safety measures you should observe, including how to dispose of your enchant once finished. We will cover the different patina options, including a very special surprise patina not shared with any other of my Etched & Layered classes!

Once we cover the etching technique, we will move on to the all important next step…layering! This is the part of the project where you will really be able to soar with creative energy. I will share many ways to layer your cuff, and will pack in as many examples as I can during our time together. Layering elements are endless, and can include vintage brooches, ear bobs, and shoe or dress clips, brass filigree, vintage tulle, recycled sari silk…the possibilities continue to surprise me!
The attachment method will be done with a cold join technique I find useful and easy, and will transfer over to many projects far beyond your Etched and Layered Cuffs.

Having taught close to 100 students, I have seen countless examples of creativity that exists designing these timeless cuffs. So, come join me, as we Etch and Layer. You won’t be disappointed!


Come Hop With US!

Hop Rules:

If you would like to hop with us and meet all the super awesome Artful Gathering 2012 Art Instructors, and have a chance to win a random drawing prize in our random drawing, then hop with us! Each week, I will announce the blog for you to visit, and off you go to meet them, and to pick up the newest secret word. Your chance to win prizes....
  1. For your chance to win, you must collect all the secret code words and submit them upon the final destination blog in May. A random drawing will be conducted from those contestants who have submitted the complete collection of secret words!
  2. Three winners will be randomly drawn. One for the $200.00 e-card to Jerry's, and two runner's up for the 25.00 e-card to Jerry's!
  3. This weeks word is .....Dips

    Next week, I'll announce the next person to hop to. Good luck!!!

~~~~~~~~~~~~~~~~~~~~~~~~~~~~~~~~~~~~~~~~~~~~~~~~~~~~~~~~~~~~~~~

Saturday, May 14, 2011

Vintage Ear Bobs

"Amber"
This cold join connection is probably my most favorite to use on my etched cuffs.
"Dancing Queen"
Along with using vintage ear bobs
I don't call them clips.  I call them bobs.
I most likely call them bobs because of my aunt Susie.  She wore beautiful ear bobs.
Her name was actually Josie, like my grandmother's....but, the family called her Susie.
She was beautiful.  Just like my grandmother.
When I was little, we would go into Houston where she lived.
Once when I was probably about seven years old, we went to visit.
At that time she was living in an apartment above a grocery store.  
In her kitchen was a booth-like nook....early sixties-style. 
I had never seen anything like it.   
It was there...that particular time that I ate my first powdered do-nut.
I didn't know what to think as I popped them in my mouth, 
and they just melted away.  I thought they were the best thing I had ever eaten!
We never ate anything like that at home.  And, you know what...never did.
My mother did would not buy them.
Yep, ear bobs.  They don't have a thing to do with do-nuts.
But, then again....maybe they do.

Wednesday, May 11, 2011

etched & layered

"Emerald Lady"
Etched & Layered
 In preparation for my Etched & Layered class, 
(and three more times after this one)
I finished my newest cuff last night.
I find myself trying to catch my breath as I think about seeing old friends 
and meeting new ones.  I will be in Fullerton in just over a week, 
where I will teach two classes~one being Etched & Layered. 
I will be at Gilding the Lily on Saturday, May 21st.
(I will be teaching Heart Strings there on May 22nd).
I am excited about finally meeting Nancy and Dede and so many other beautiful ladies.
Many I have only talked to online.
I do confess, 
I am constantly on the lookout for vintage rhinestone brooches, ear clips, 
shoe buckles and vintage buttons.  
I probably have more than you can imagine.
But, when I saw this one sitting in one of the vendor's cases at my local antique shop,  
I immediately knew I wanted it.
Now I know for sure it was worth every penny.
The best part of "Emerald Lady" (for me) is the gorgeous brass piece behind the Ruiz Studios 1920s brooch.  It is one that Jill, at Brass Bouquet, named "Diane".
I thought this was a beautiful piece of filigree the moment I saw it.
Thank you Jill for such a beautiful honor.
And don't forget, 
if you are on the east coast, registration is now open for ArtBLISS
where I will be teaching Etched & Layered on September 24th.

I am sprinting past today only slowing down for tomorrow - diane =)

Wednesday, March 16, 2011

rhinestones & rosaries

"Crystals & Pearls"
I taught one of my favorite classes, Rhinestones & Rosaries on Thursday.  It was full of awesomely talented students...each eager to bring their own flavor to the piece they would call their own.
In fact, Susan finished hers that evening after class, 
bringing it to our class with Richard (the very next day) to show me!
Beautiful work.
I especially love the crucifix, with it's ornate brass end-caps, 
which matches the bead caps in the rosary.   
These rosaries are higher end, and occasionally I find one I can afford.
Susan is one of those estate sale goers from Dallas.
I would love to hitch a ride on her coat tails sometimes =)
See how she made a double strand, adding a vintage rhinestone brooch across the top of the brass focal?  
BTW...she worked hard on that focal!
That's more than half the fun, 
working out the puzzle of making pieces work together,
cold-join style!
 Sue is a lady I have been speaking to online for probably almost a year.  She and I finally met when she came to a class I taught in College Station last December. 
This is her necklace.
Isn't it gorgeous?  I love that unusual connector, and the crucifix is so beautiful.
I love the deep blue color of the faceted glass beads in her rosary.
...some of the other "works in progress".
My dh was there each day helping me in class...
sharing his knowledge of important things...such as faulty tools.
He's THE gadget guy, and the one who wrote the book on ~
"whoever has the most gadgets wins".
The bottom line~
I had the best day with some great ladies.
Thank you ~ all ~ you were amazing!
Then, after I thought I had one of the best days in my many days of best,
Melissa Manley showed up, to park her tools & supplies for her class,  
which she would be teaching in the room later that evening.
I was packing my things, trying to focus on stuffing getting all my tools to fit back into the bag they fit fine in earlier that morning!
She was wearing a pair of the most beautiful enameled earrings!  In fact, they were even prettier than the ones she had been wearing sitting next to me at Meet the Artist night.
I told her I loved them~'cause I did!
She pulled them off and gave them to me~
...paying it forward she said.
I immediately put them on.
They matched my jewelry AND my outfit perfectly!
She said, "how could I not?  They were made for YOU!"
I almost cried.  
This was the jewelry I was wearing....my bead soup pieces,
along with one of my Etched & Layered cuffs,
wrapped in luscious recycled sari silk.
You be the judge!
I was am overwhelmed.

Sunday, September 19, 2010

etched & layered

'"Grace"

"Fly Away"


"Quiet Glitz"
I love designing these!
I could layer all day and all night, and not get tired!
These are (a couple) of my newest Etched & Layered Cuffs.  
They'll soon be stuffed into my vintage jewelry boxes,
headed to Marburger!  
I am so excited, as I am actually listed on the site as a vendor
for the first time.  (Thank you Agnes =)
See you there....just over a week now!

Monday, July 28, 2008

Layers Necklace-Project 4


"Etched No.1"
I had decided to etch the metal for my next project in Deryn's Summer Jewelry Challenge , where we are using Mary Hettmansperger's book, Wrap, Stitch, Fold & Rivet. My first attempt with etching about a month ago, was not successful. I tried once more today, and I am so satisfied with how the metal pieces turned out. I etched on copper, nickel and brass, using some of my favorite stamps.
The brass piece on the bottom is the one I like most. I didn't want to cover up too much of it, as the patina I applied (by torch) turned out very nice. I lightly sanded it with steel wool to emphasize the beautiful pattern of the etching.
The next piece is nickel. The etching is slightly lighter, but just as nice. I used the same technique as on the brass.
The hammered swirl charm was one I had done a couple of weeks ago, and has been sitting on my desk. I had also added patina with my torch, after it was hammered. The fun thing about the swirl in this piece, is that it can swing freely. I like the slight movement. On page 29 of Mary's book, she gave a detailed explaination on how to make a wrapped loop swirl charm. This one, though not wrapped, had been done for practice, just waiting for the right project.
I took 24 gauge sterling silver wire, drew a ball on the end with my torch; then wrapped it as Mary had done in her example piece. I strung a short piece of oxidized sterling silver chain thru the fold. Added a couple of twisted copper jump rings, a hand forged hammered sterling silver s-clasp, and an oxidized brass chain to finish the piece.
I cut out two additional pieces of the etched and patined brass. I must make a pair of matching earrings, but they will have to wait till tomorrow.